Introduction
iCars is a comprehensive vehicle simulation and animation add-on for Blender. It is designed to give you full control over vehicles and traffic systems directly inside your scenes. Whether you are aiming for realistic vehicle motion, cinematic drifting shots, interactive driving experiences, or large-scale procedural traffic in complex urban environments, iCars provides the tools to achieve it efficiently.
This chapter introduces the core concepts of iCars and guides you through the starting workflow, helping you understand how the system is structured and how its main components work together.
General Overview
iCars includes multiple vehicle control systems designed to cover a wide range of production needs. These systems support vehicle animation and motion control, real-time vehicle simulation and free driving, as well as large-scale traffic simulation compatible with detailed urban scenes.
In addition to its control systems, iCars provides a growing library of vehicle assets and supports the integration of custom vehicles, allowing you to adapt the system to your own projects and pipelines.
Under the hood, iCars is built on a robust architecture that combines Geometry Nodes with Python-based logic. This hybrid structure allows for high performance, procedural flexibility, and precise control, while remaining accessible to artists and technical users alike.
The complete architecture is organized around three main system types:
- Animation Systems.
- Free Drive System.
- Traffic System.
The Animation Systems control vehicle movement based on configurable factors such as speed, acceleration, drifting behavior, and path-following parameters. These systems are ideal for cinematic shots and pre-defined vehicle motion.
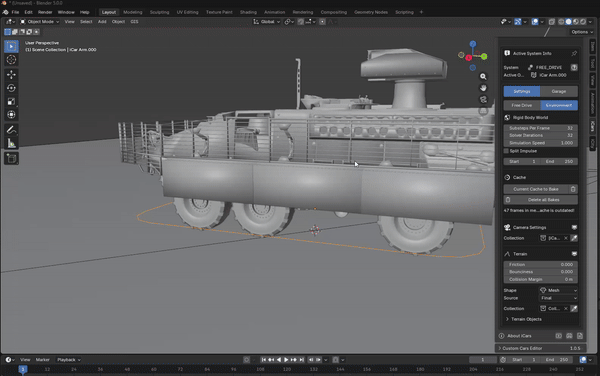
The Free Drive System allows direct user control of vehicles using keyboard input, driven by realistic rigid body physics. This system is suitable for interactive simulations, testing vehicle behavior, or recording natural driving motion. The user can use any vehicle type within the free drive system be configuring thier vehicle model using our Rig interface.
The Traffic System enables the creation of large road networks populated with multiple vehicles that follow traffic rules, lanes, and behavioral logic. It is designed for scalability and works efficiently in complex urban environments.
These systems can be used independently or combined together to create complete simulation environments with both automated and user-controlled vehicles.
iCars also allows users to add custom vehicle assets to the existing library, ensuring full flexibility when working with unique designs, external models, or studio-specific vehicle collections.
System Packs
iCars is distributed in five different packs, allowing users to choose the features that best fit their workflow:
- Free Pack: Includes limited testing features of the animation system, along with two selected vehicles from the asset library.
- Animations Pack: Includes the full-featured animation system, the free drive system, custom vehicle rigging tools, and two selected vehicles.
- Vehicles Pack: Includes the full vehicle asset library along with the free version of the animation system.
- Traffic Pack: Includes the full-featured traffic system with two selected vehicles.
- Full Pack: Includes all iCars features: animation systems, free drive, rigging tools, traffic system, and the complete vehicle asset library.
If you purchase two or more packs, all included features will be merged and accessible from the same unified interface panel.
Installation
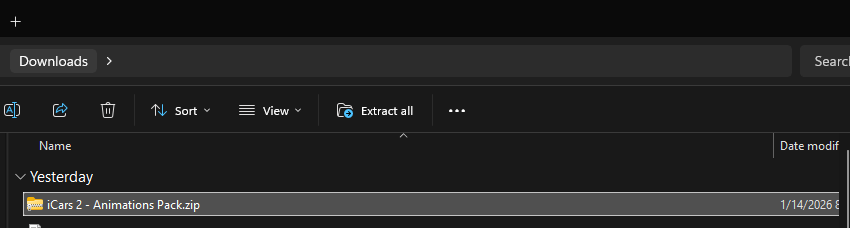
After downloading your selected pack, it will be provided as a ZIP file. You can install the addon directly through Blender Preferences.
Save the addon to your preferred location > Open Blender > From the Edit menu in the top-left corner, open Preferences > Go to the Add-ons tab > Click the dropdown menu in the top-right corner > Select Install from Disk > Navigate to your addon file path > Select the addon ZIP file and press Install from Disk
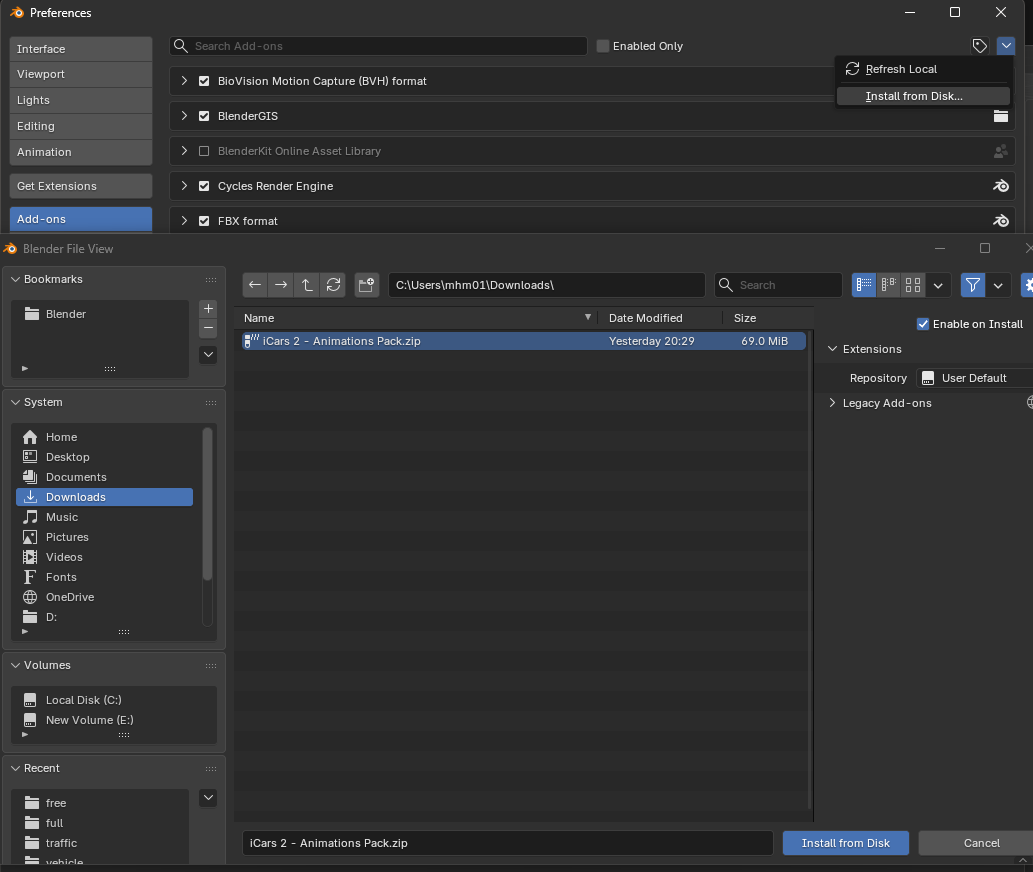
Once you click Install from Disk, the addon will be loaded into Blender and registered in the addons system. The addon preferences panel will appear, displaying general information such as the addon name, description, installation path, useful links, licensing details based on the selected pack, general settings, and a complete list of available iCars products.

Getting Started
The iCars interface is located in the sidebar of the 3D Viewport. You can reveal it by dragging the small arrow on the right side of the viewport or by pressing the N key while in the 3D Viewport.
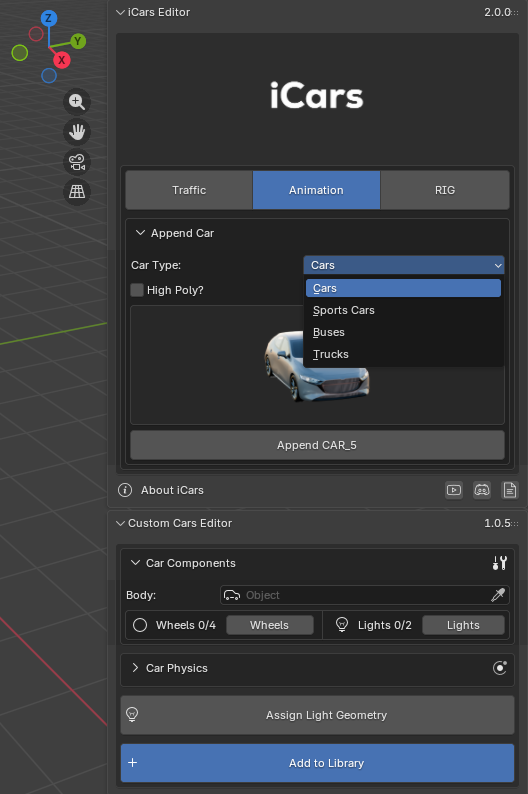
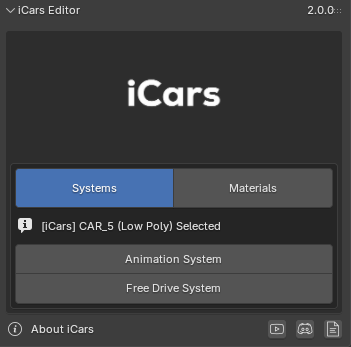
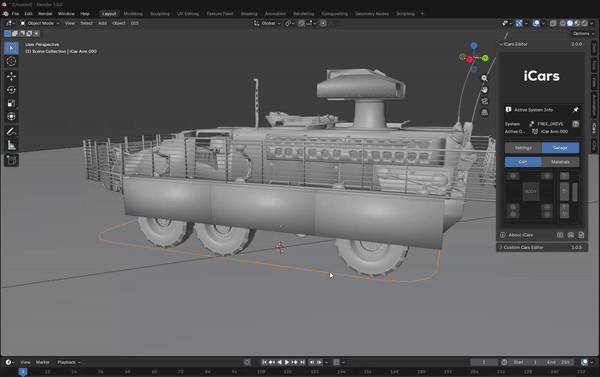
The interface is divided into two main panels: the iCars Editor Panel, which contains control settings for the different systems, and the Custom Car Editor, where you can configure and register your own vehicles into the system library.
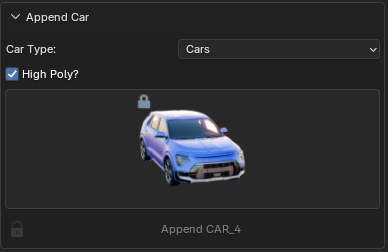
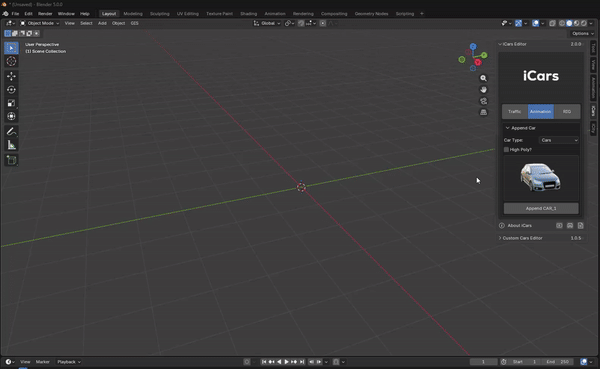
The main editor panel contains three primary tabs: Traffic to launch the traffic system, Animation to start animation systems, and Rig to set up rigid body constraints required for free driving. Within the Animation tab, a thumbnail-based browser displays the available vehicle library. Users can filter vehicles by type and polygon count, then append them directly into the scene.
The Full Pack and Vehicles Pack include the complete vehicle library, which currently contains 18 vehicles across different categories. Other packs include only two selected vehicles from both high-poly and low-poly lists. All additional vehicles will appear locked until the user upgrades their pack.
After appending a vehicle, the interface will display options to start one of the available systems (Animation System or Free Drive System). From there, the user can proceed with the selected workflow or navigate back to the vehicle browser, traffic interface, or rigging tools.
In the next chapters, we will explore each system in detail and explain their workflows step by step.
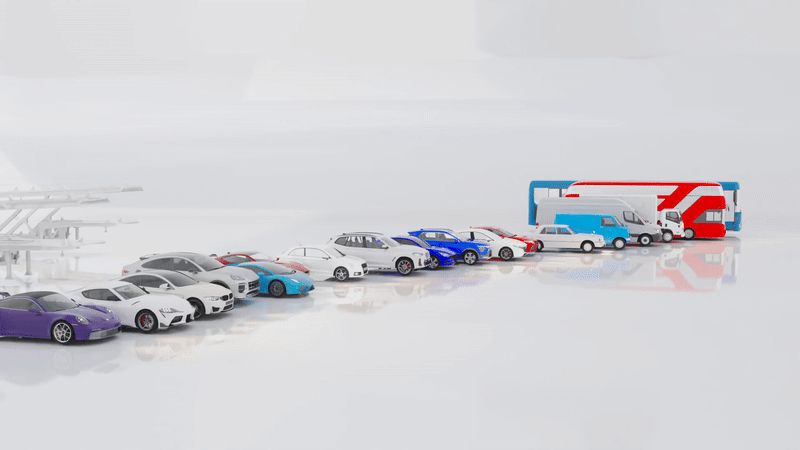
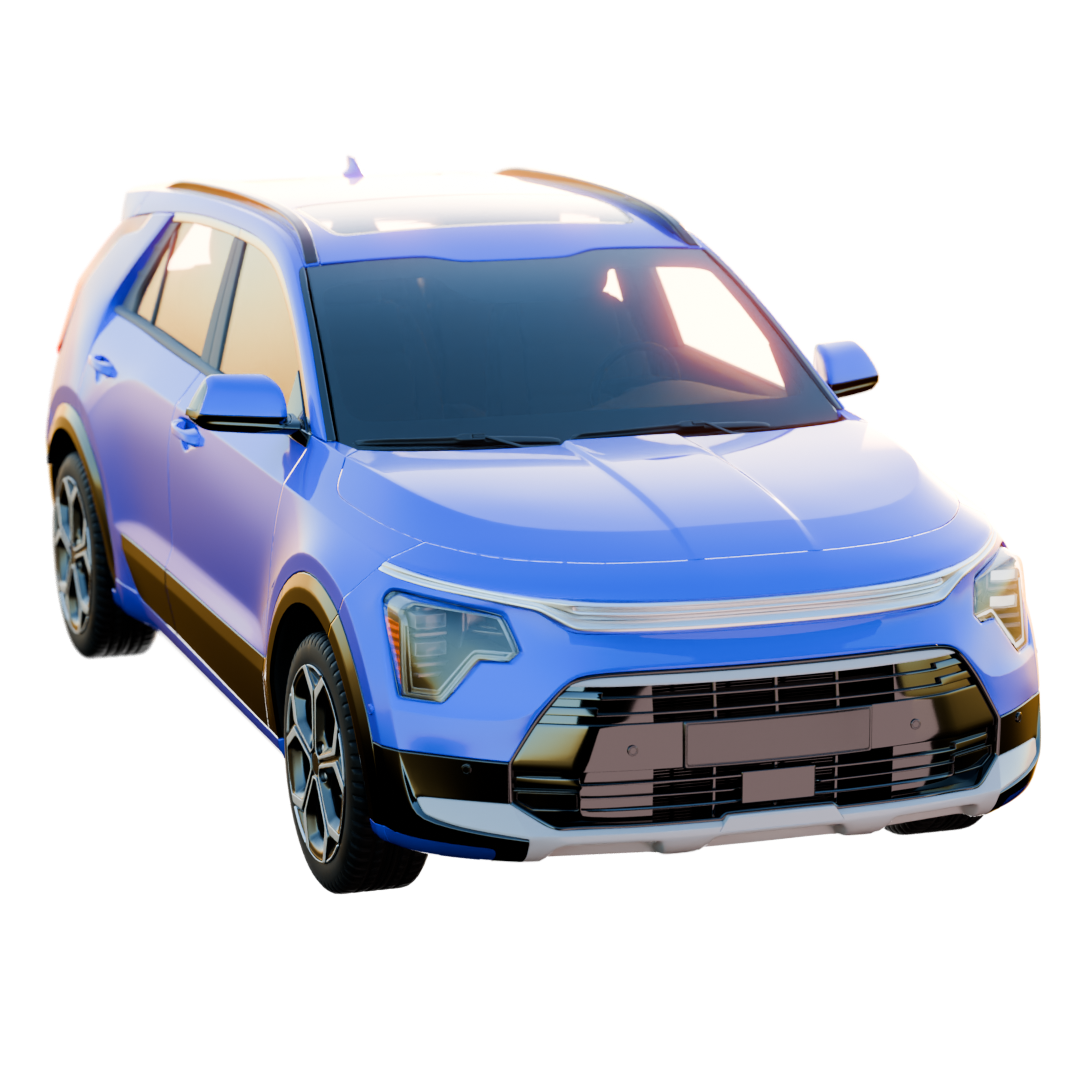
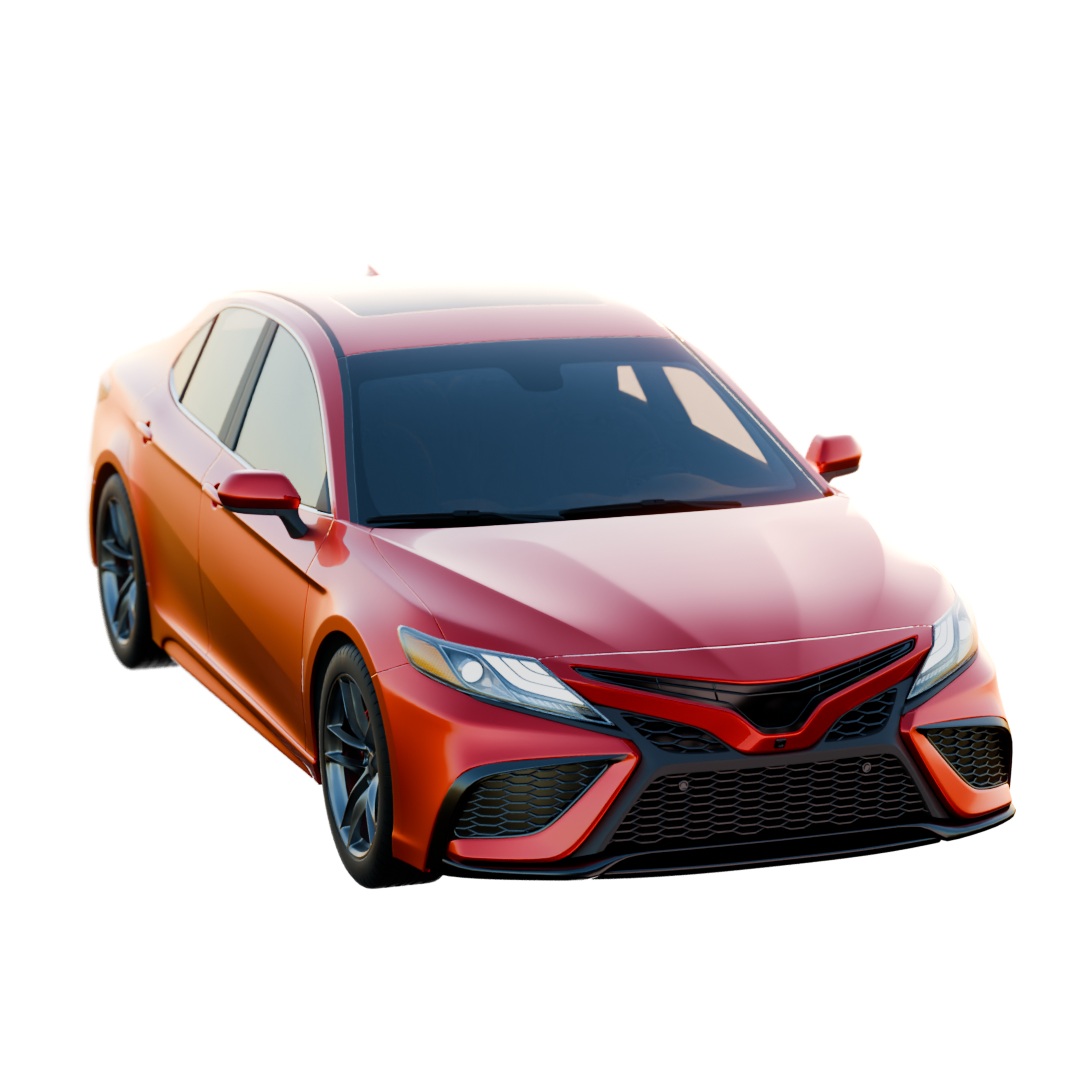
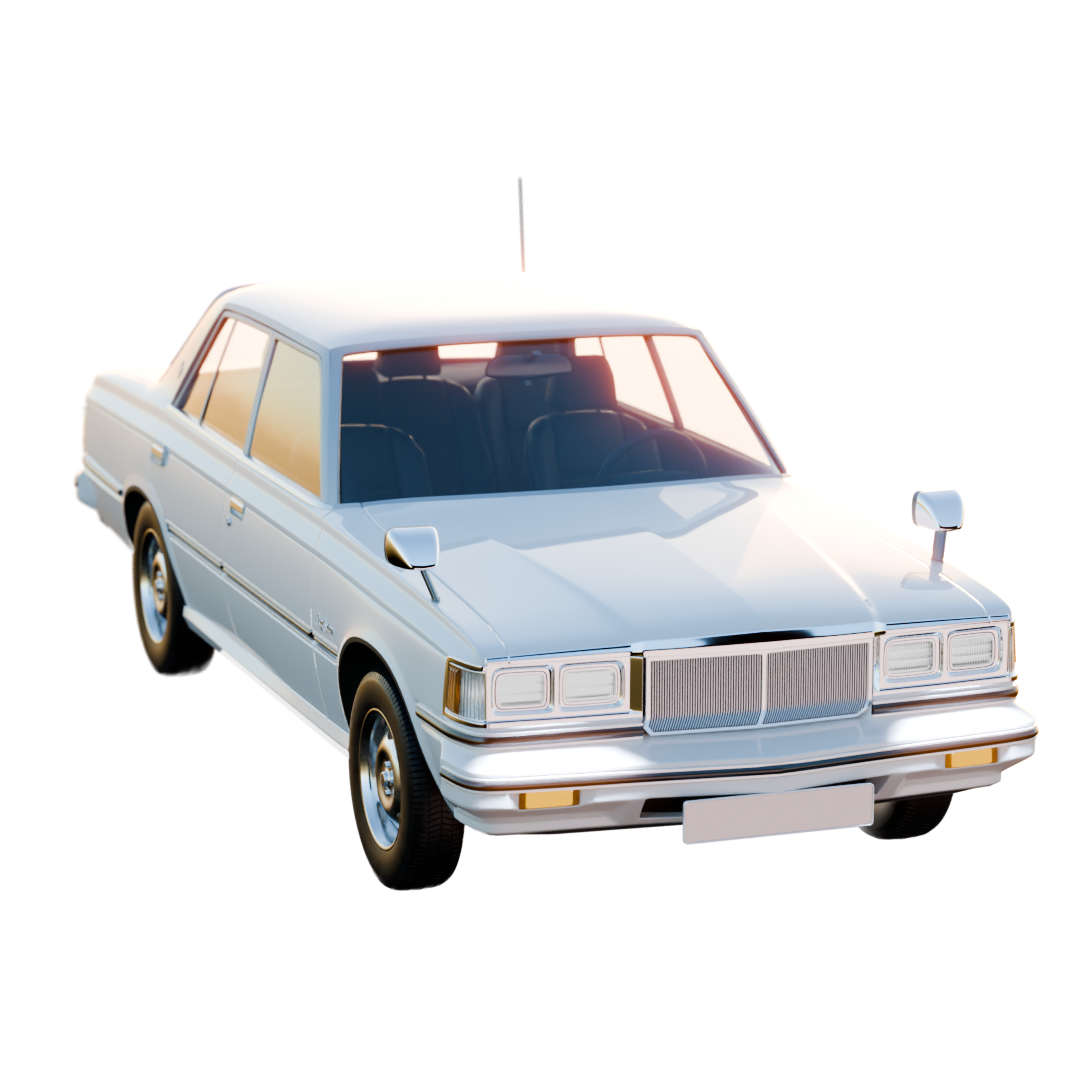
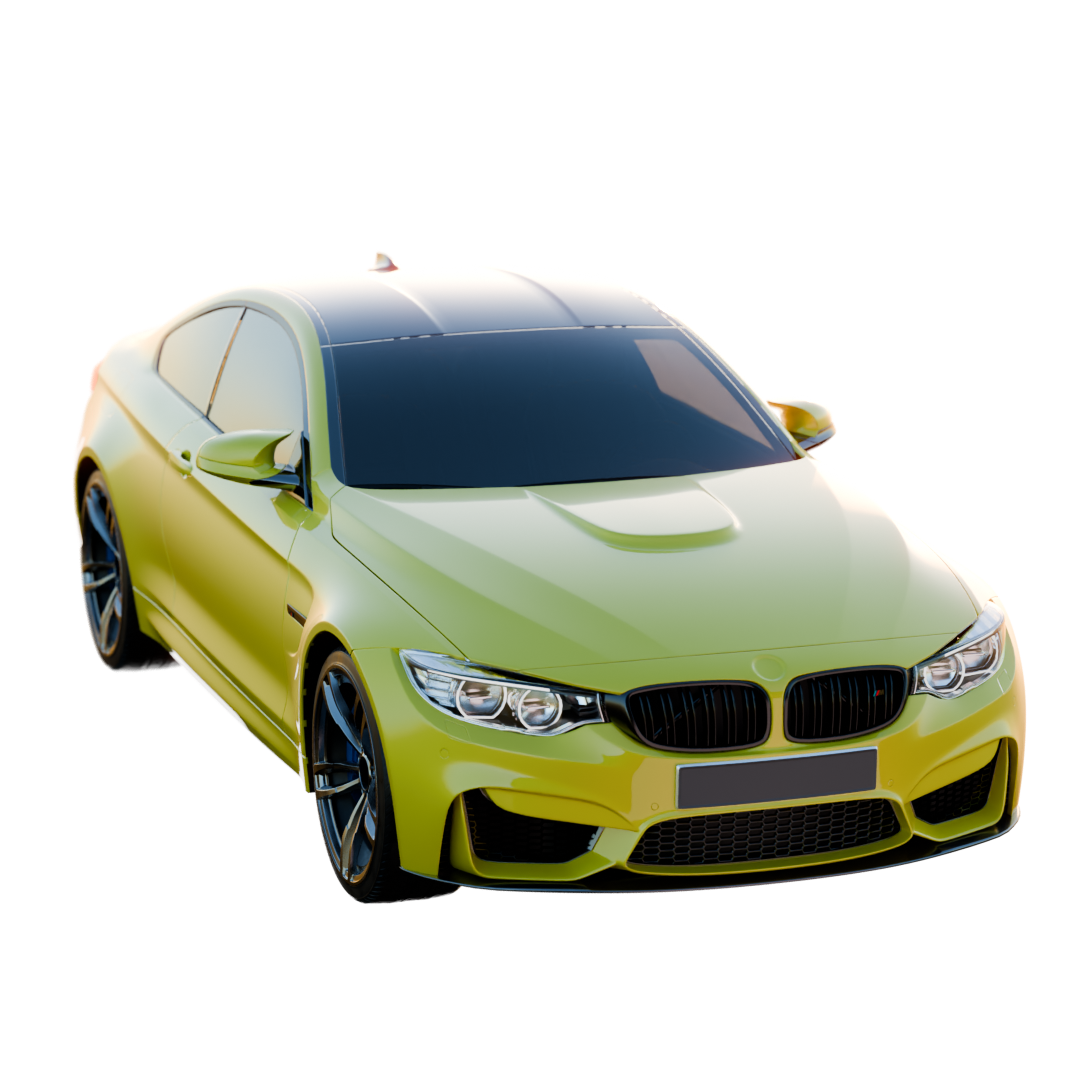
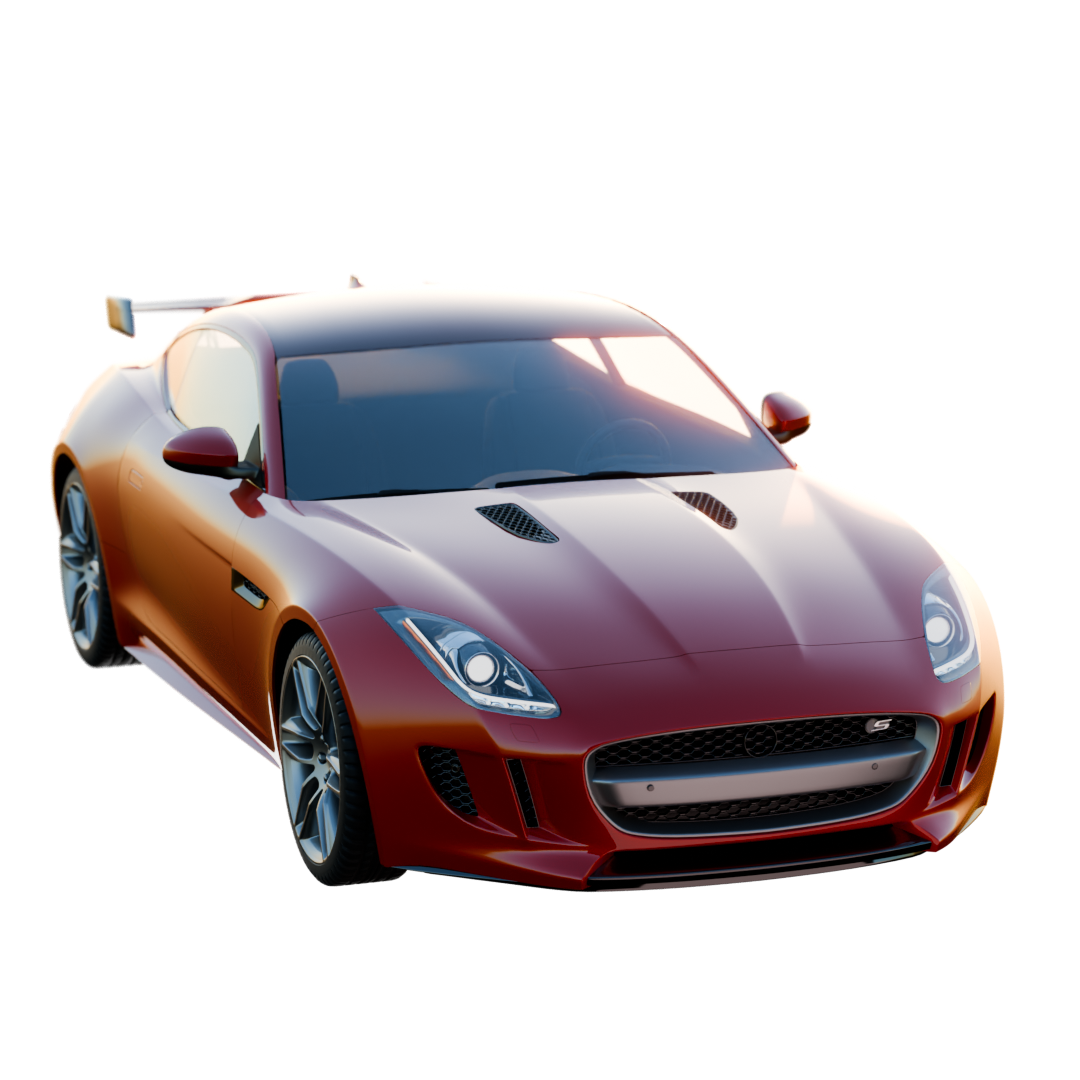
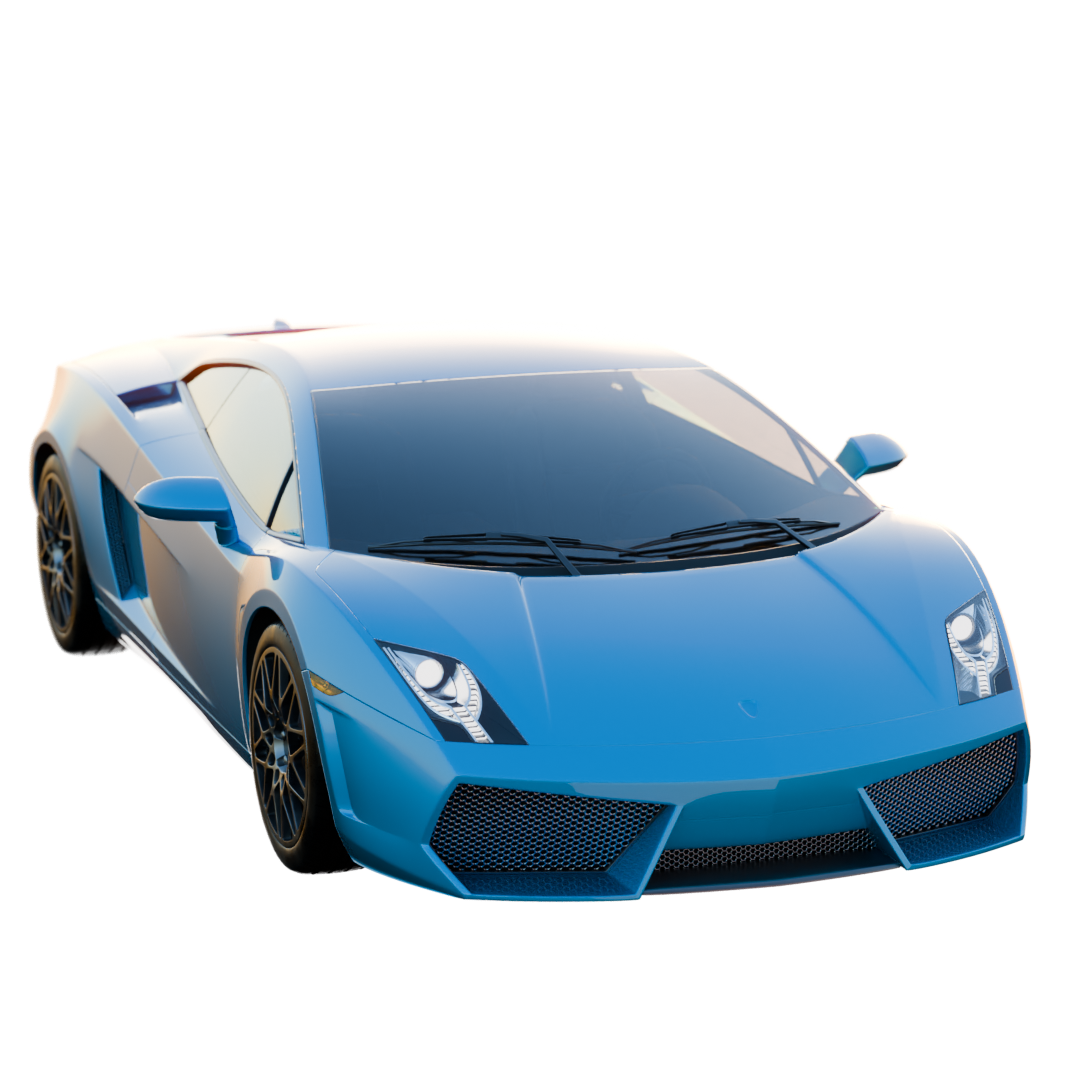
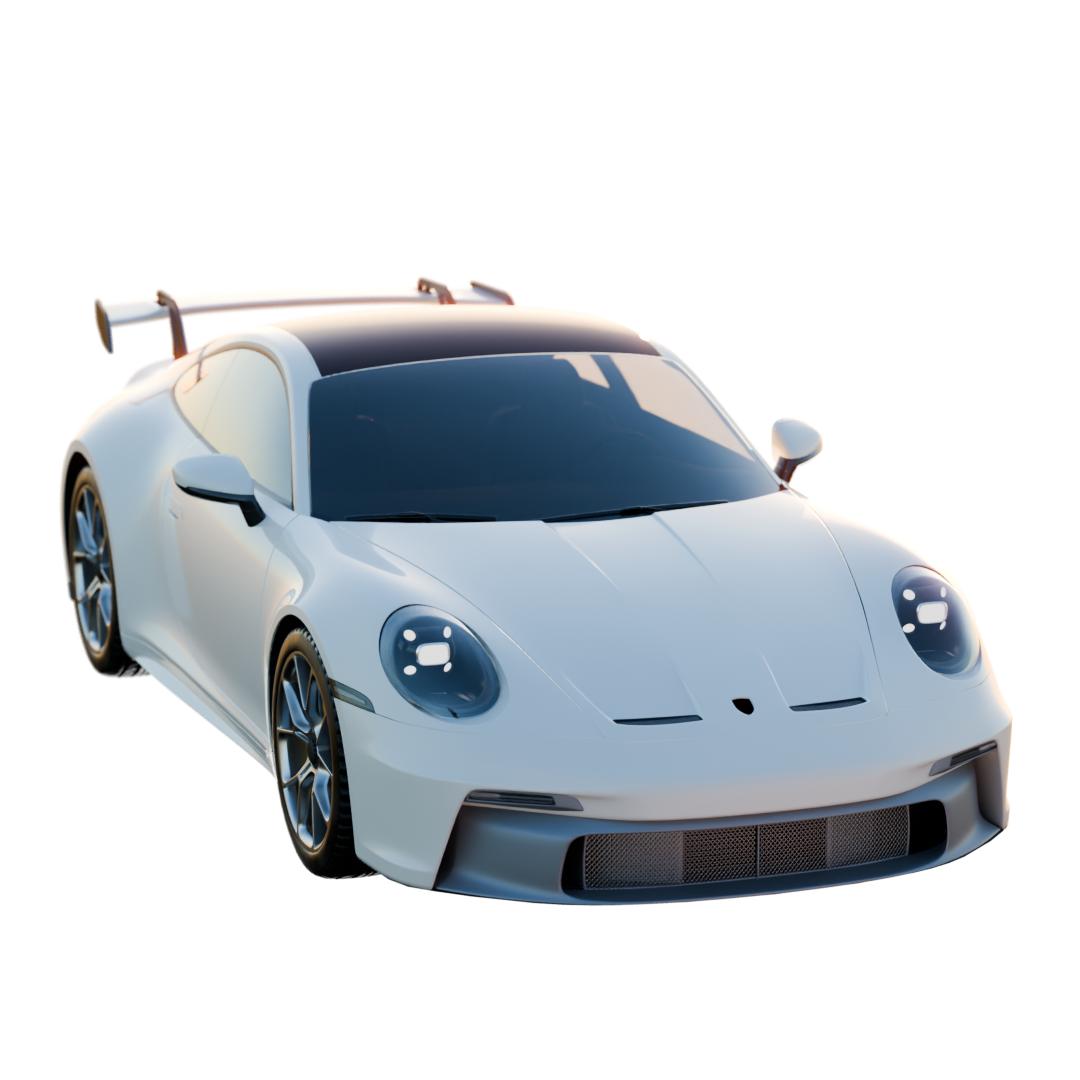
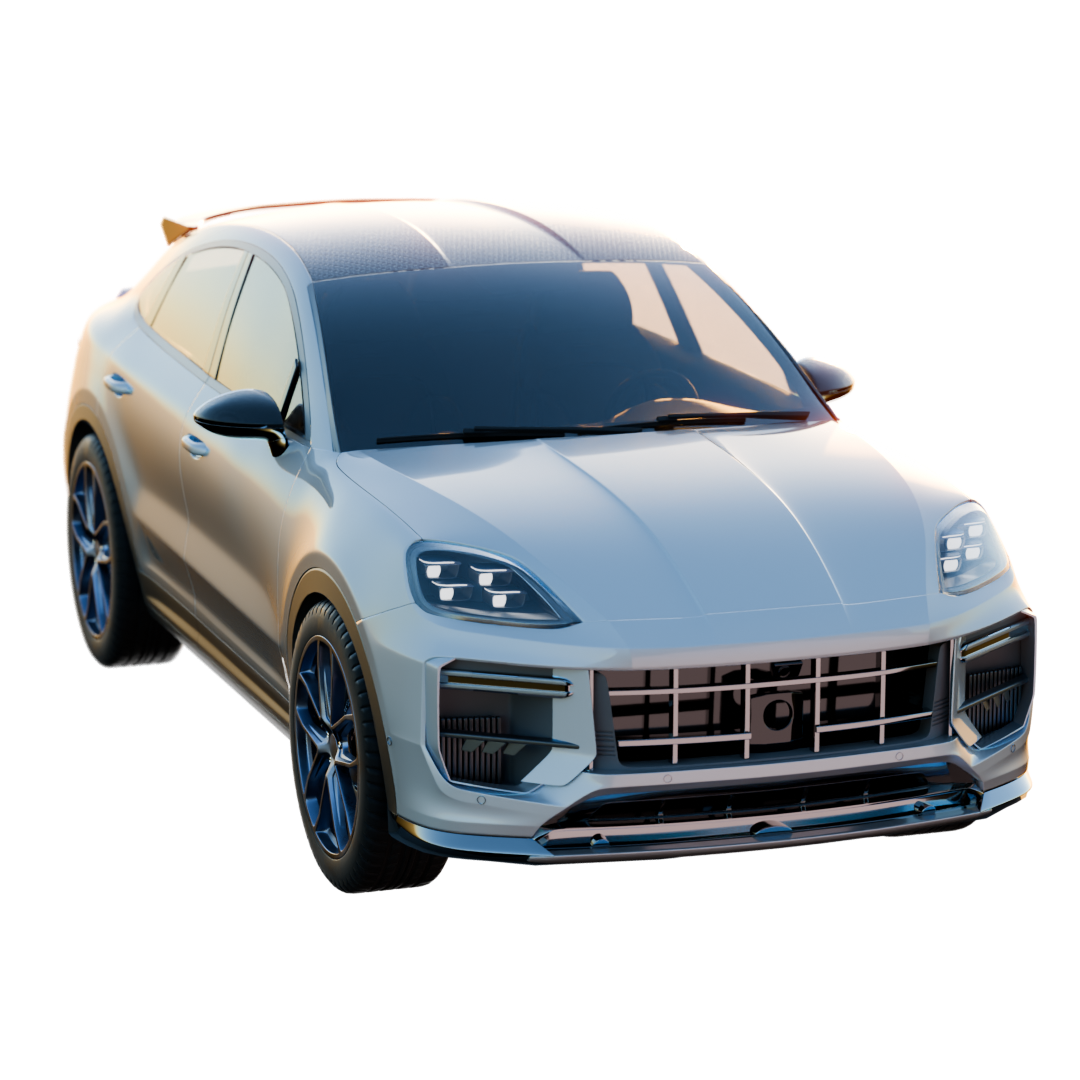
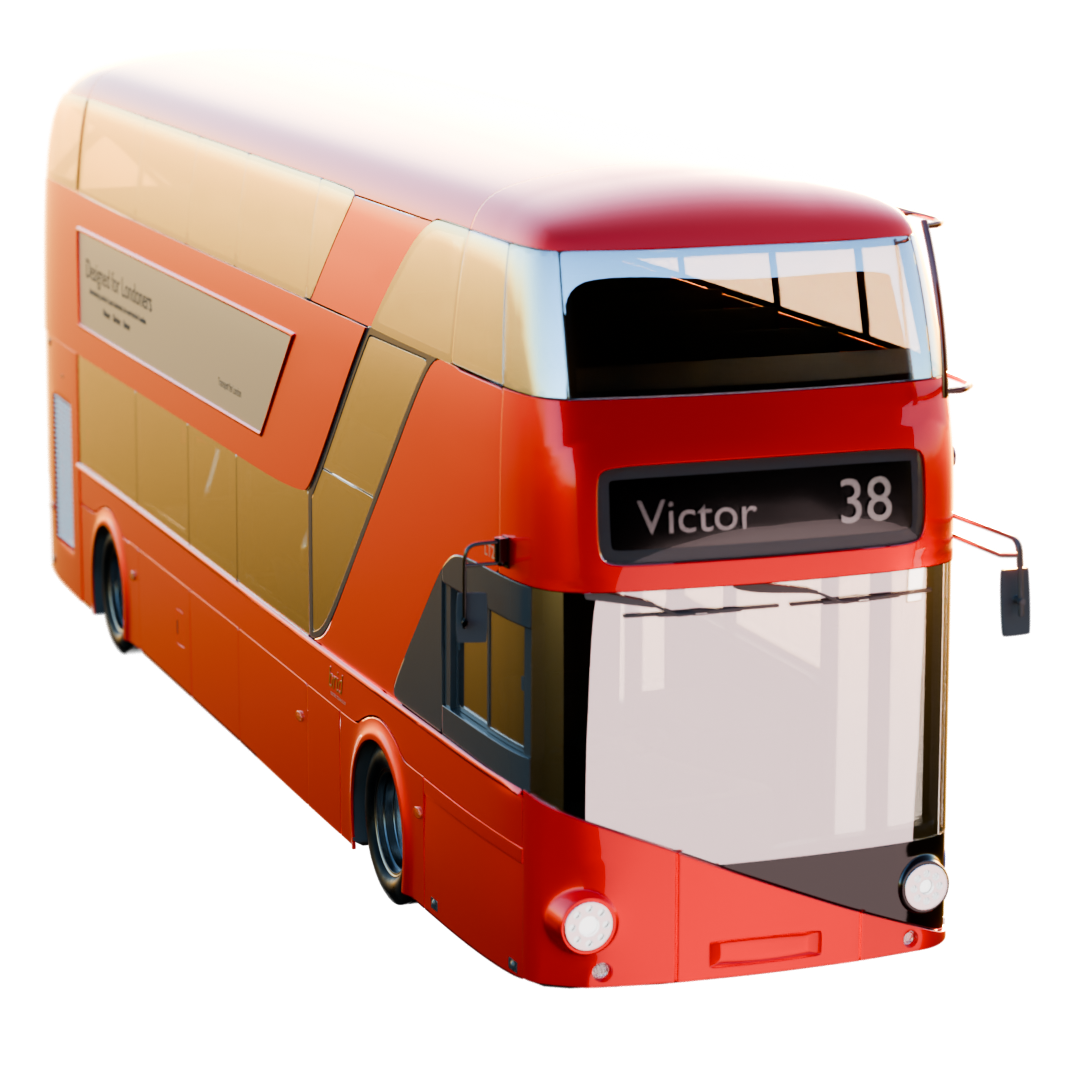
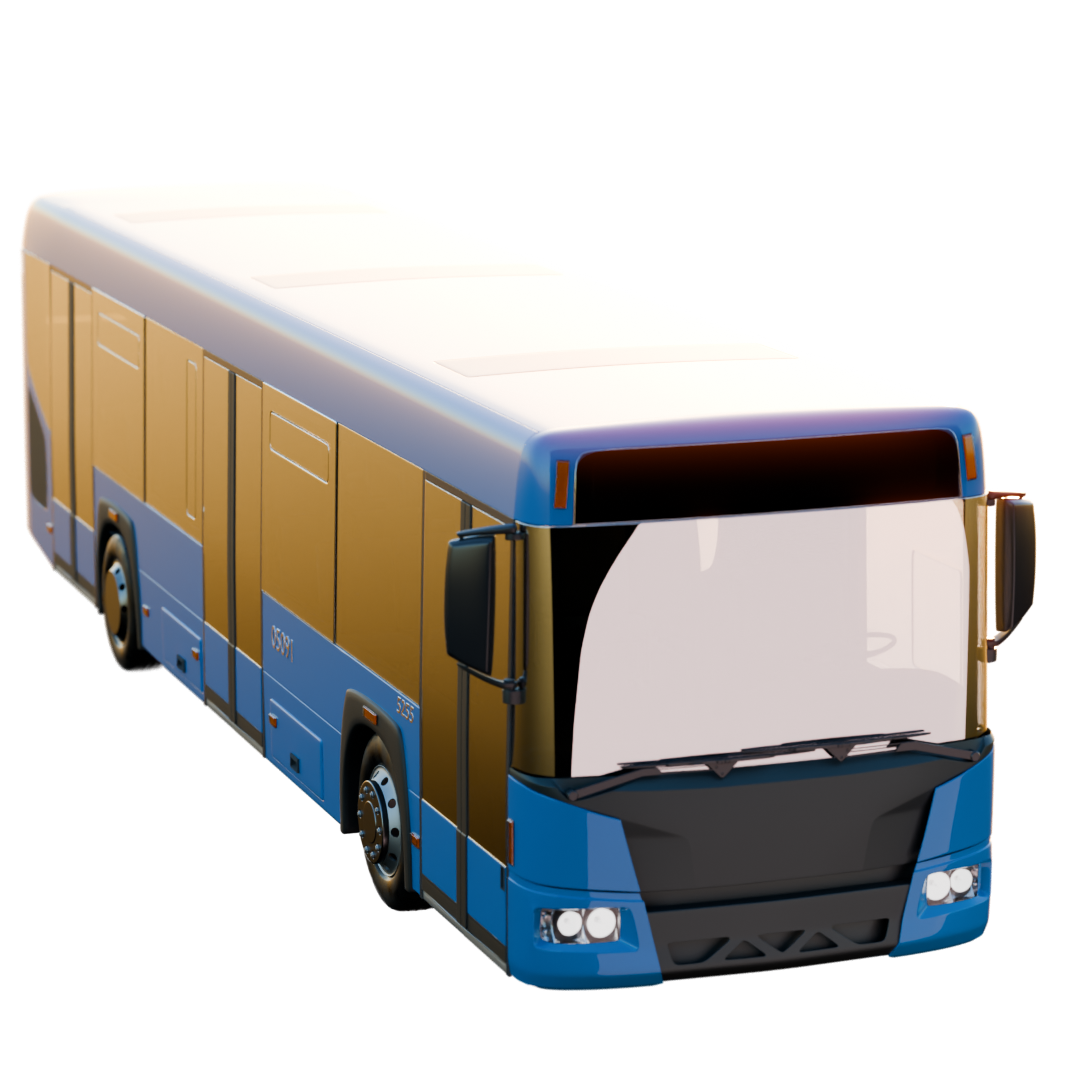
iCars Vehicles
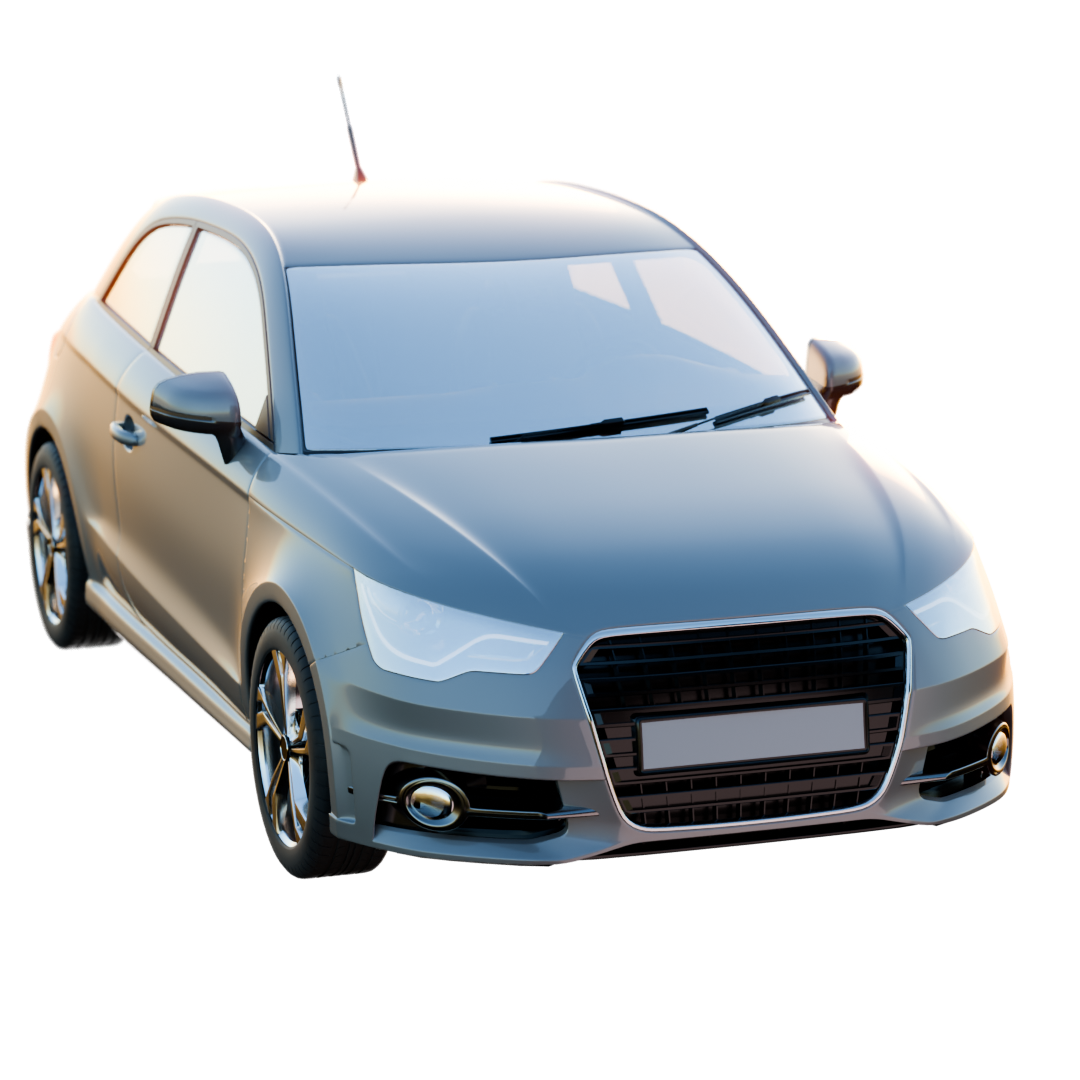
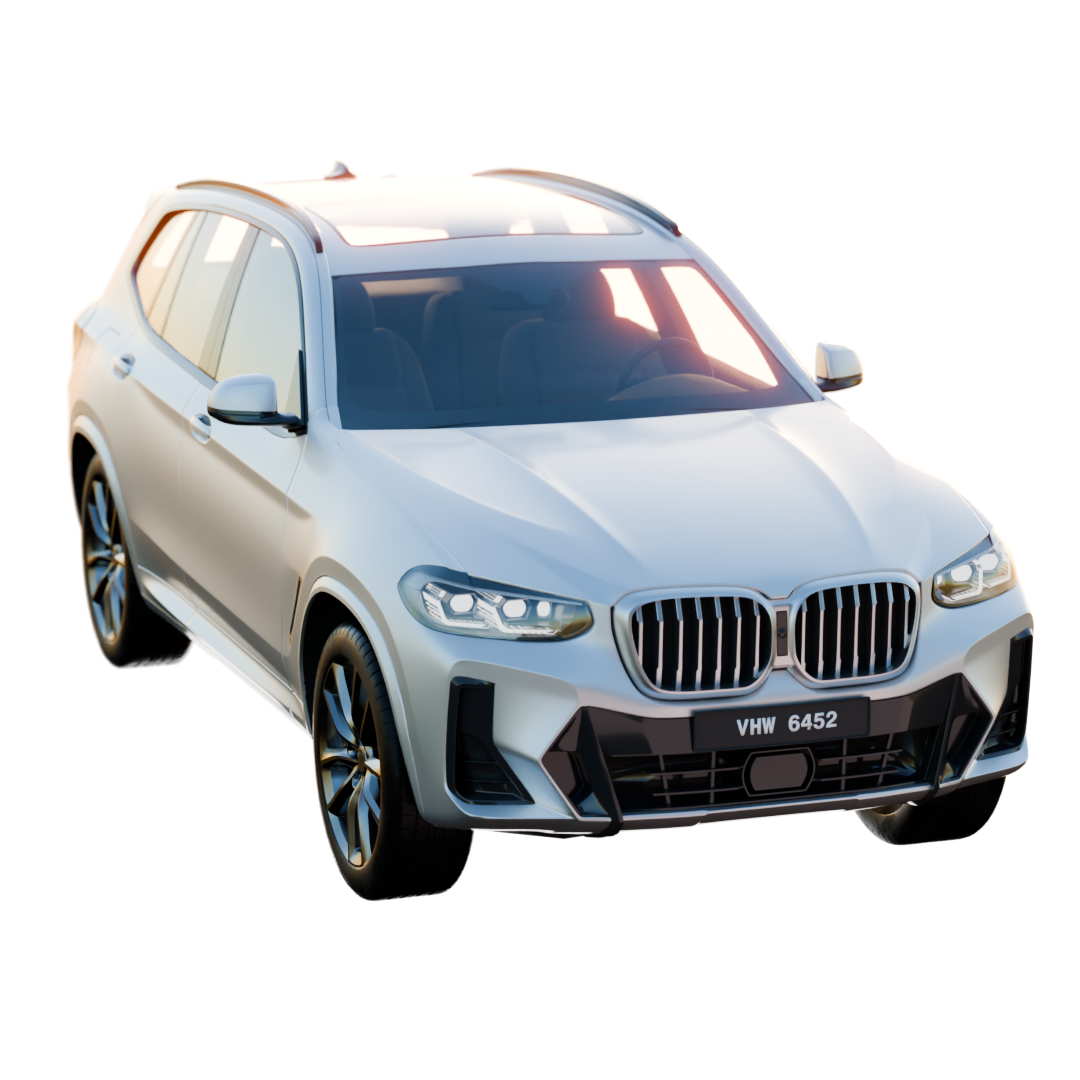
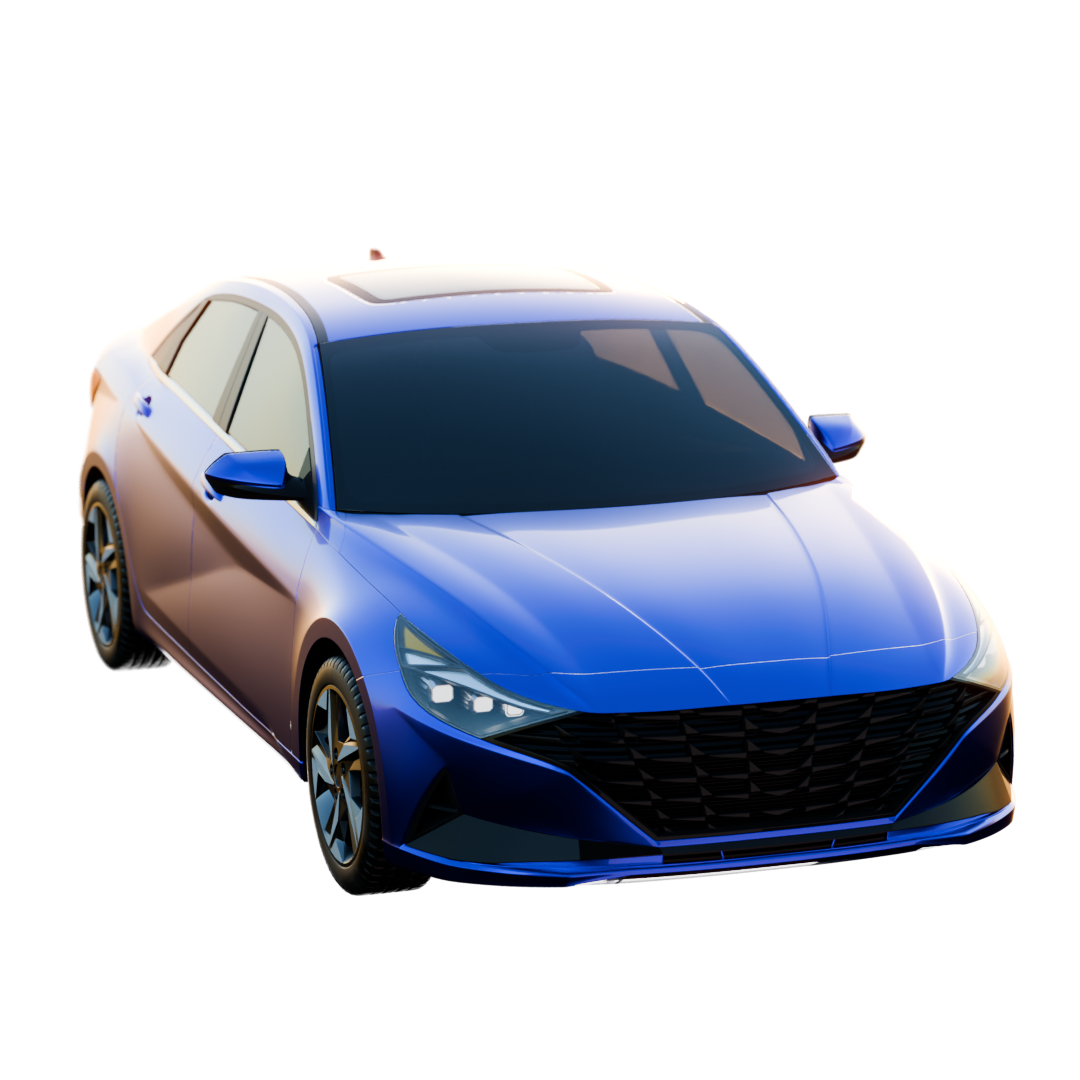
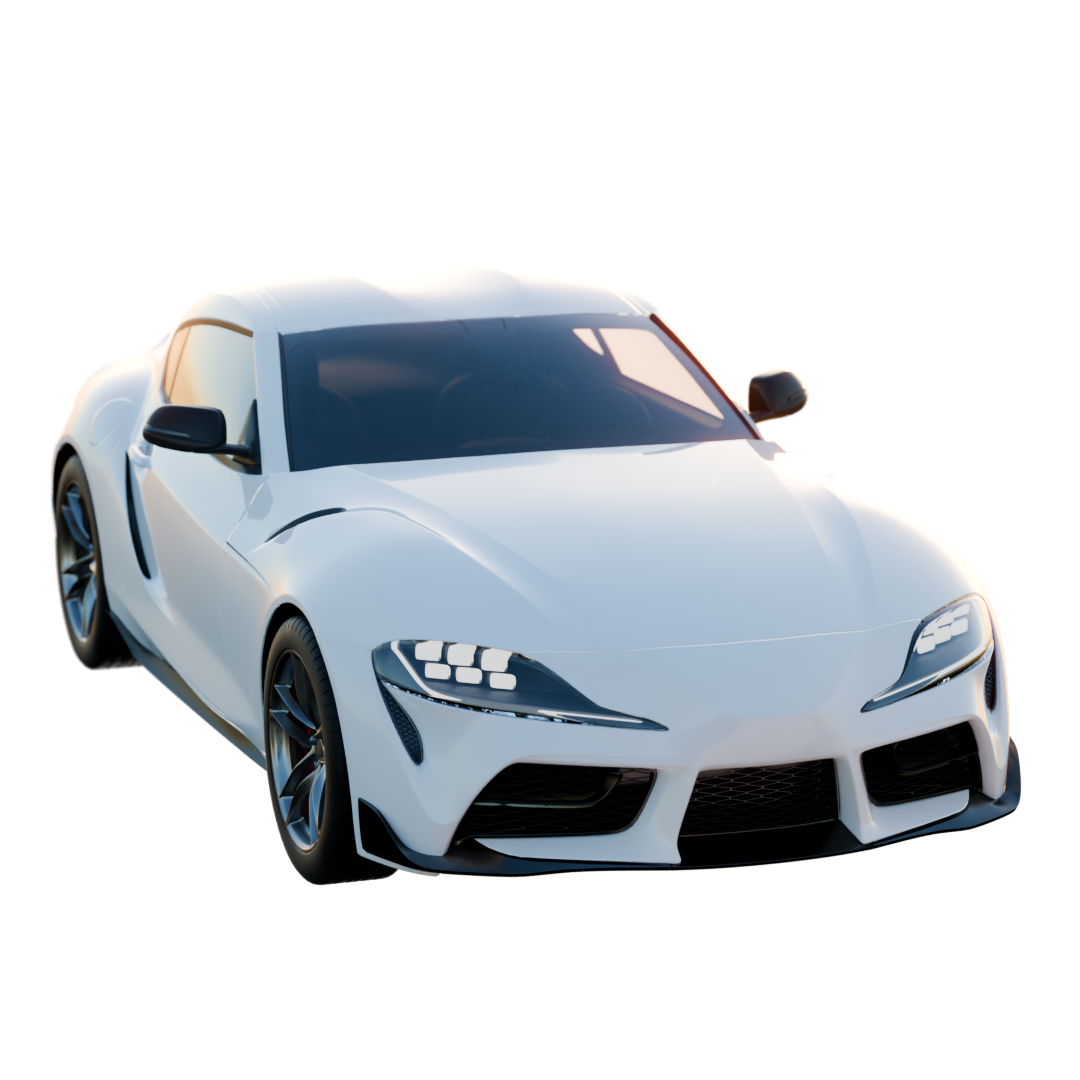
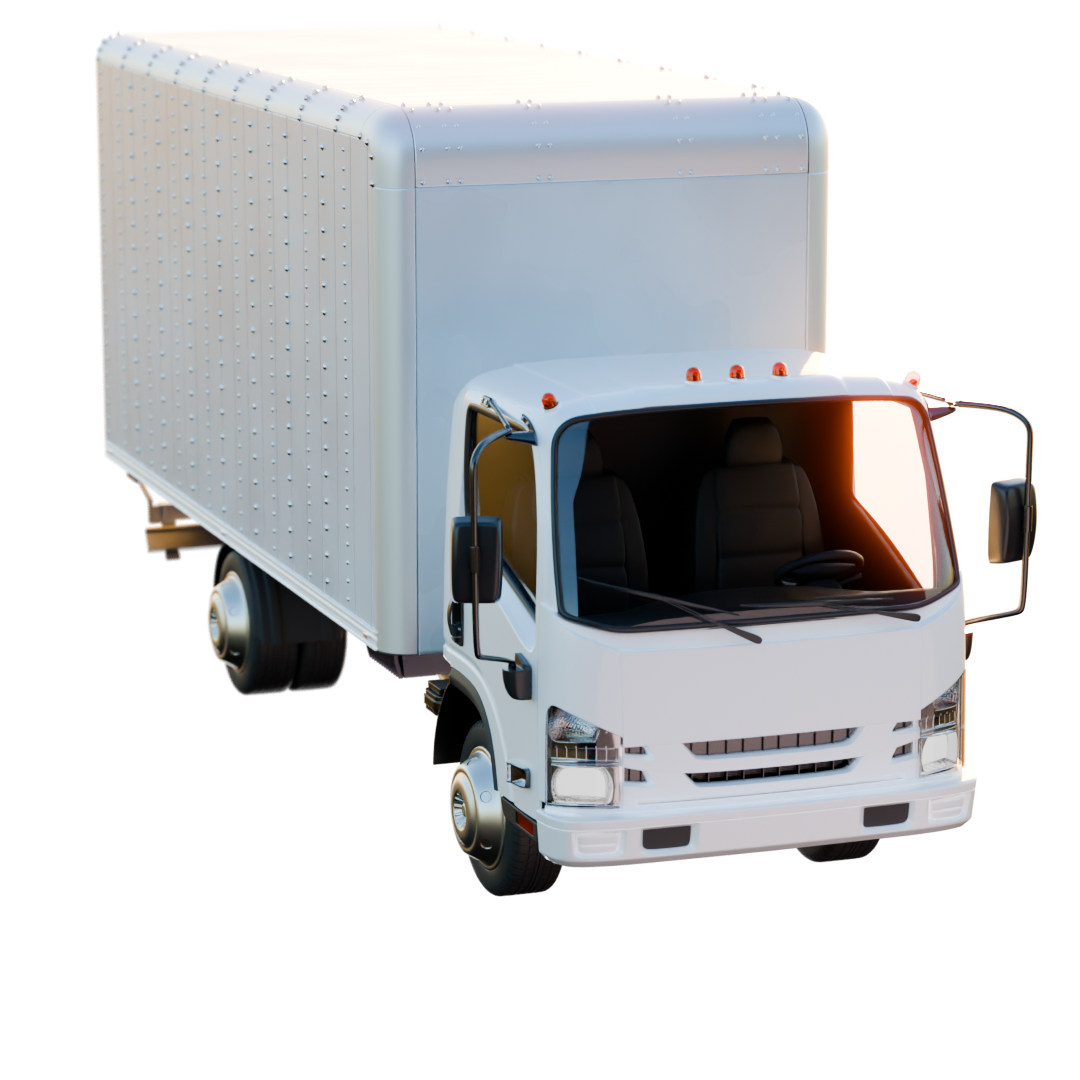
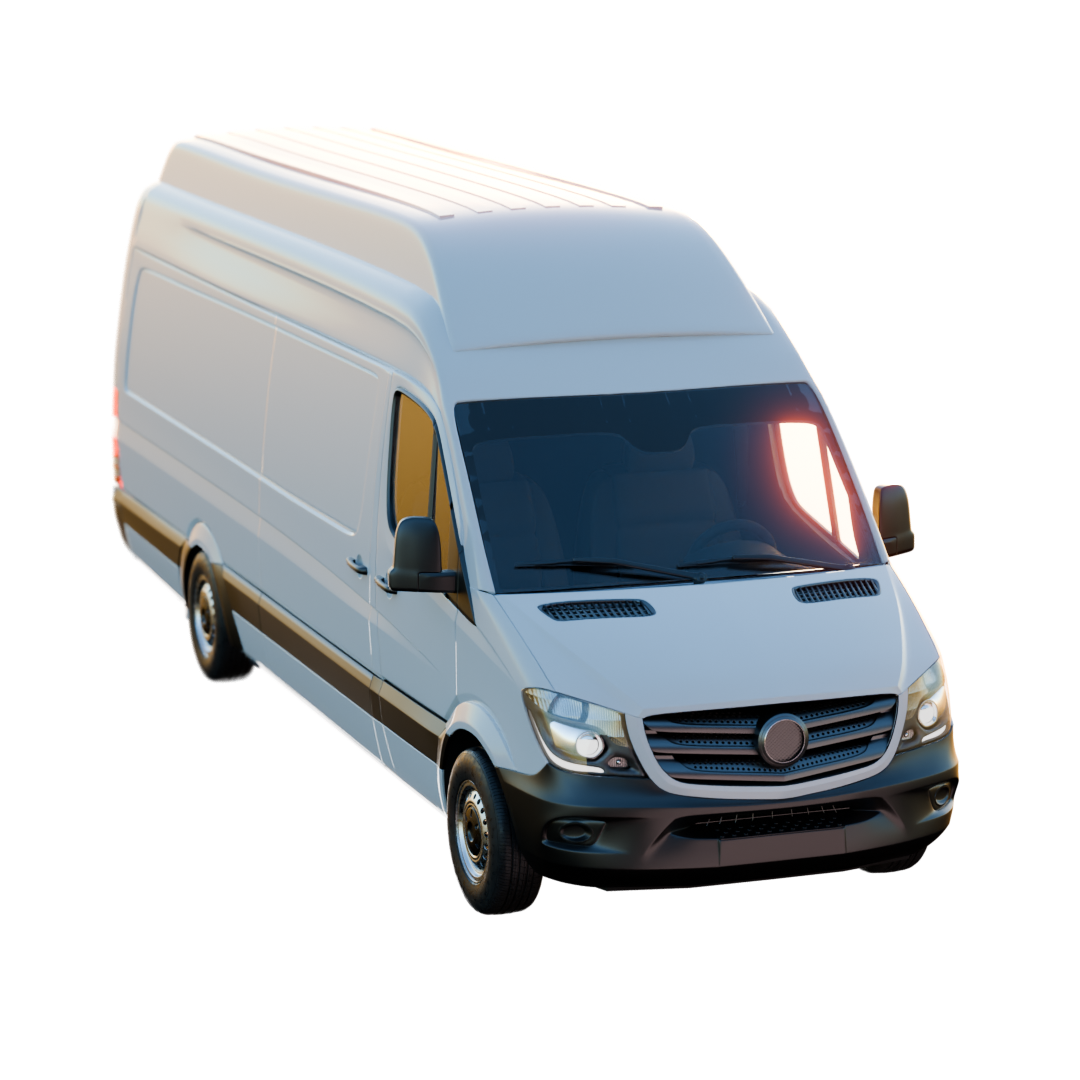
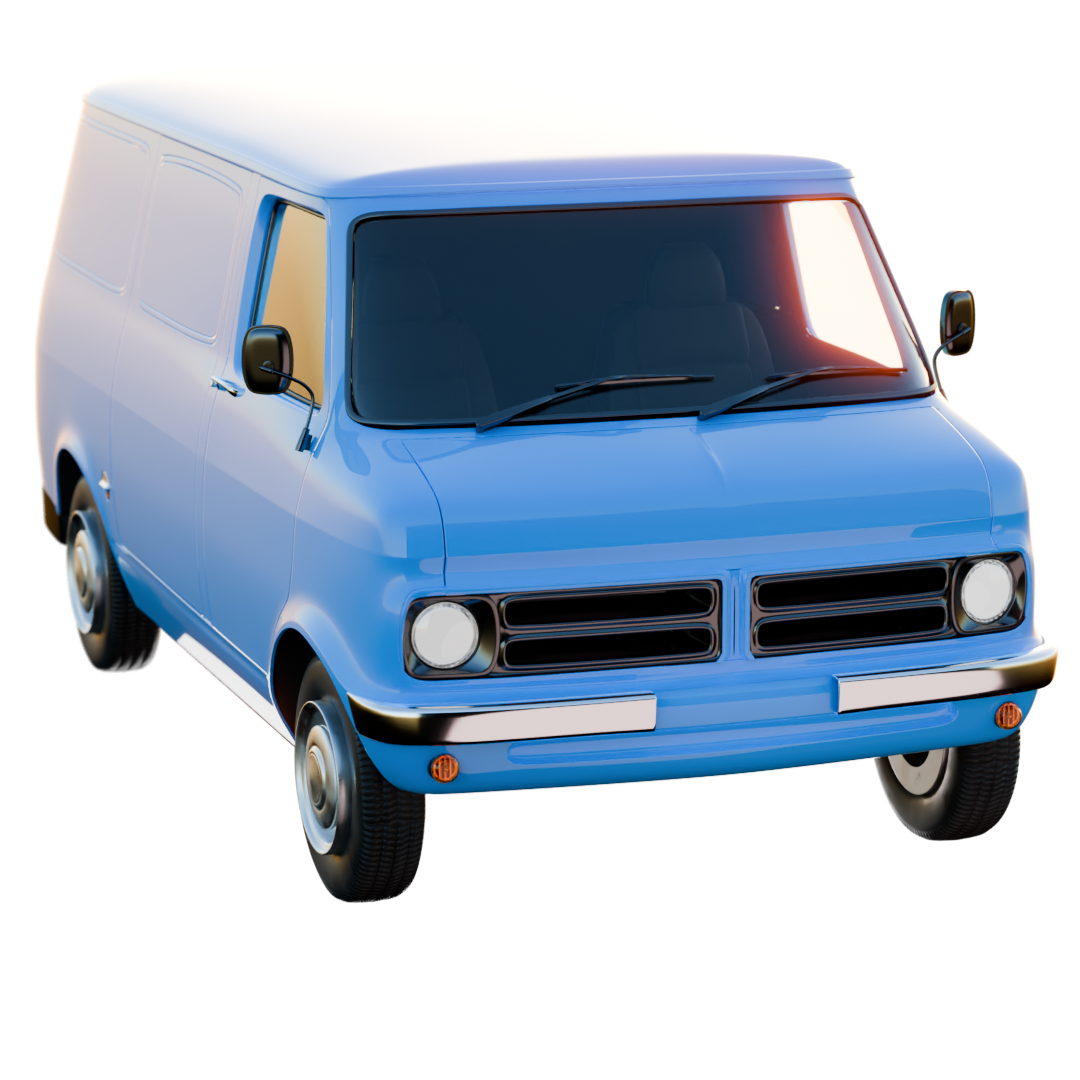
iCars includes a built-in vehicle library containing a total of 18 vehicles, designed to cover a wide range of production needs and scene types.
- 7 Cars
- 6 Sports Cars
- 2 Buses
- 3 Trucks
Each vehicle is available in either high-poly or low-poly versions, allowing users to choose between visual fidelity and performance optimization.
Vehicles are accessed through a thumbnail-based viewer that displays the entire library in a grid layout. This viewer allows users to visually browse available vehicles and quickly select the desired asset.

Only two vehicles are available in the Free Pack, Animation Pack, and Traffic Pack: Car 05 and Sports Car 02. All other vehicles remain locked until the user upgrades to the Vehicles Pack or Full Pack.
Appending a Vehicle
When a vehicle is appended from the library, it is placed at the current 3D Cursor position in the scene.
Each vehicle is imported as a fully rigged vehicle system, consisting of an armature with animation bones and mesh components parented as children of the armature.
The rig structure is designed to support keyframe animation and provides predefined bones for wheel rotation, steering, and suspension behavior. This makes the vehicle immediately compatible with both the Animation System and the Free Drive System.

The vehicle append panel is the main entry point for animation workflows. Once a vehicle is appended, the user can choose which system to start directly from the interface.
The iCars interface is context-aware. When the vehicle armature or its rig bones are selected, the interface switches from the append panel to display system controls and additional configuration options.
If the user selects any object that is not part of the vehicle rig, the interface automatically returns to the vehicle append panel.
Create a Custom Car
iCars allows users to add their own vehicles to the system using the Custom Car Editor, located at the bottom of the iCars Editor panel.
To prepare a custom vehicle, the user must first apply scale and transformations to all vehicle objects. The following elements must then be selected:
- The car body object
- All wheel objects
- The front lights objects
Front light geometry can be assigned as attributes, allowing the system to recognize and control lighting behavior correctly within the animation and driving systems.
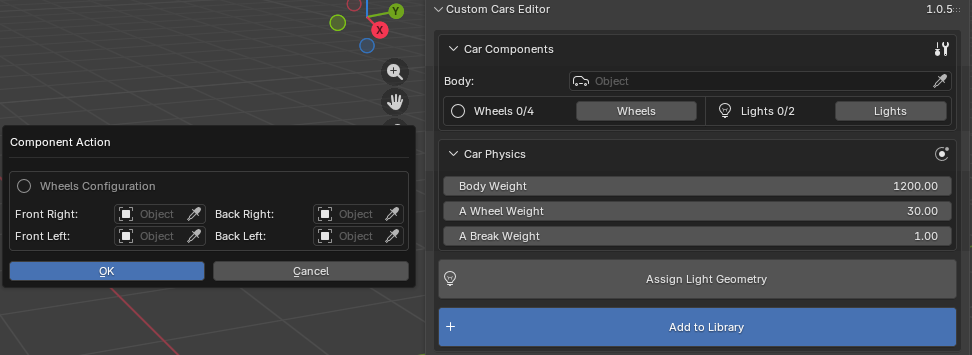
Once the configuration is complete, pressing Add to Library will save the custom vehicle and make it available for future use within the vehicle thumbnail viewer.
Animation System
The Animation System in iCars is built on a complex Geometry Nodes architecture that generates realistic vehicle motion along a predefined path. This system allows artists to create controlled, cinematic car animations while maintaining flexibility for creative adjustments.
Using the Animation System, users can control speed behavior, drifting, path curvature, terrain interaction, camera motion, and visual effects such as smoke — all from a unified interface.
The Animation System interface becomes visible when the user selects the Animation System object in the scene. Alternatively, the user can enable Pin Interface, which keeps the Animation System interface visible even when the selection changes.
At the top of the interface, an information box displays key details about the system, including its status, assigned vehicle, and active configuration.
The interface is divided into two main tabs: Animation, which contains all system controls, and Garage, which manages vehicle-related configurations.
General Settings
The General tab contains the core controls that define how the vehicle moves along the animation path and interacts with the environment.
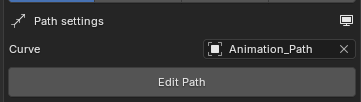
Path Settings
The animation path is defined by a curve object that drives the vehicle movement. Users can assign a custom path object, replace it with another curve, or edit it directly to create custom motion layouts.
For clarity while working, the path object can be shown or hidden directly from the interface.
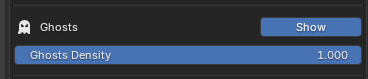
Ghosts
The Ghosts system visualizes the future positions and poses of the vehicle along the path without running the animation. This allows artists to preview movement and adjust the path and parameters more efficiently.
Users can control the density of the ghosts, reducing or increasing the number of previews, or disable them entirely if they are not required.
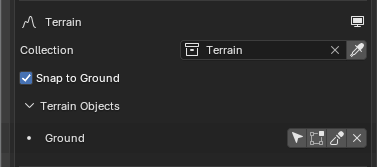
Terrain Interaction
The Animation System supports terrain interaction through a terrain collection. This collection defines which objects the vehicle movement will interact with.
Users can assign an existing collection or create a new one directly from the interface, and add or remove objects as needed.
When Snap to Ground is enabled, the vehicle will interact with the objects inside the terrain collection. If the collection contains objects, a list will appear showing all terrain elements.
From this list, users can select an object, enter Edit Mode or Sculpt Mode, and modify or remove it. Removing an object from the list will only remove it from the terrain collection, not delete it from the scene. The terrain collection can also be hidden in the viewport.
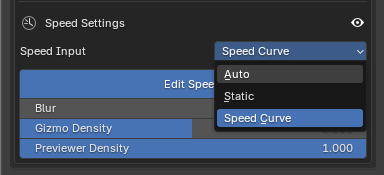
Speed Control
The Animation System provides three different speed control modes:
- Auto Speed — The vehicle accelerates naturally to a maximum speed, then decelerates until it stops, simulating physical behavior.
- Static Speed — A constant speed value is applied uniformly along the entire path.
- Speed Curve — The user defines speed values at specific points along the path using interactive gizmos.
For speed curves, gizmo density can be adjusted or disabled for a cleaner viewport. A visual speed curve is displayed above the path, showing speed values along the trajectory. Users can control its visibility, density, and smoothness to achieve fluid motion.
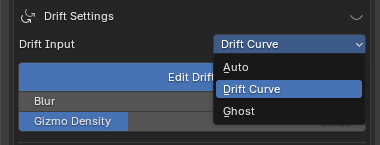
Drift Settings
The Drift settings control how the vehicle behaves during turns and lateral motion along the animation path. Like speed control, drifting is driven by a procedural Geometry Nodes system and offers multiple control modes to support both physical realism and artistic direction.
The Animation System provides three different drift control modes:
- Auto Drift — Drift behavior is calculated automatically based on simulated physical forces, such as speed and path curvature. This mode produces natural drifting without manual intervention.
- Drift Curve — Drift values are defined along the path using a curve, similar to the Speed Curve system. Unlike speed, drift values are applied on a 2D plane, affecting lateral movement rather than vertical displacement.
- Ghosts Drift — A predictive drift system where multiple ghosts are generated along the path, allowing the user to control drift based on future frames. This is a core feature of the Animation System and provides precise, intuitive control over complex drifting motion.
For both Drift Curve and Ghosts Drift modes, a visual drift curve is displayed along the path to represent drift intensity at each point. Users can enable or disable the curve preview, adjust its density, and refine its smoothness for controlled and fluid motion.
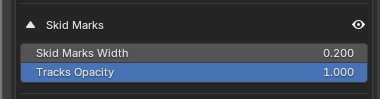
Skid Marks
Skid marks can be enabled to enhance realism during drifting. When activated, the system generates procedural skid marks that follow the vehicle’s wheel motion.
Users can control the width and opacity of the skid marks, allowing them to adapt the visual style from subtle tire traces to strong cinematic effects.
Tilt & Limits
Tilt settings control the body roll and rotational pose of the vehicle during drifting. This allows users to exaggerate or reduce tilt behavior to match the desired visual style.
Limit settings define constraints on steering angle and rotation values, preventing unrealistic motion and maintaining stable behavior along the drift path.

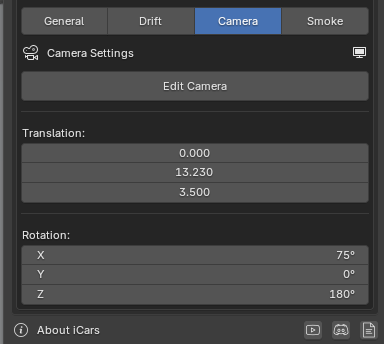
Camera Settings
The Camera settings control a system-generated camera that is automatically configured to follow and frame the animated vehicle. This camera is fully integrated into the Animation System and reacts dynamically to the vehicle’s motion.
By default, the camera is managed by the system. However, users can customize its transform and behavior directly from the interface.
The Edit Camera button allows the user to manually adjust the camera’s location, rotation, and scale using standard Blender transform tools.
In addition to manual editing, the interface provides sliders for fine control over camera translation and rotation, enabling precise framing without leaving the Animation System workflow.
For viewport clarity, the camera can be shown or hidden directly from the interface at any time.
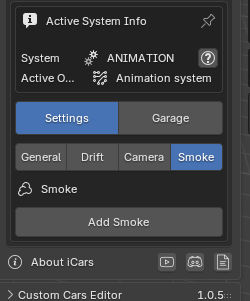
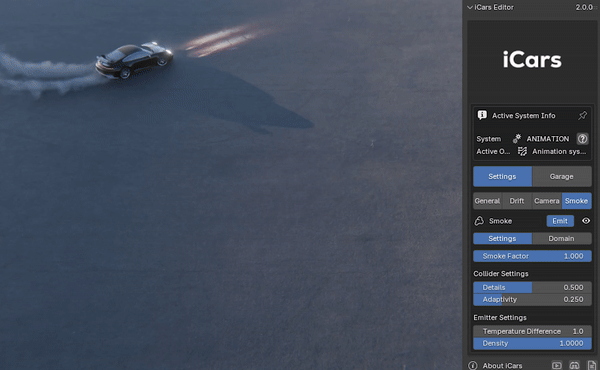
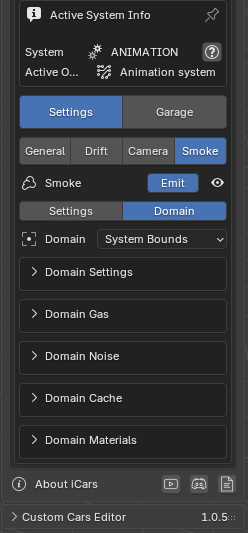
Smoke Settings
The Smoke tab allows users to add and control procedural smoke effects generated by the vehicle during animation. The smoke system is fully integrated with the Animation System and reacts dynamically to vehicle motion, drifting, and wheel behavior.
To initialize the smoke system, the user must press the Add Smoke button. This action appends a dedicated smoke collection into the scene.
The appended smoke collection contains three core objects that work together to generate the smoke effect:
- Smoke Domain — Defines the bounding volume in which the smoke simulation is allowed to exist. Smoke will never exceed this domain.
- Body Collider — Defines the vehicle body boundaries and prevents smoke from intersecting or entering the car body.
- Smoke Emitter — Defines the emission source of the smoke, typically aligned with the wheel tracks.
These objects are automatically configured and linked together to ensure correct smoke behavior without requiring manual setup.
The user can Emit and disable the smoke from the Emit button on the top of the interface, and also can disable the collection of the smoke. The Smoke interface is divided into two main tabs: Settings and Domain.
Settings
The Settings tab contains controls related to the smoke emission behavior and collision handling.
From this tab, users can adjust:
- Smoke factor and overall influence
- Body Collider Level of Details and Adaptivity
- Smoke Emitter Density and Temperature Difference
Domain
The Domain tab contains the majority of the smoke simulation controls and defines how the smoke behaves within the simulation space.
Domain settings include:
- Domain General Settings
- Domain Gas Settings
- Domain Noise Settings
- Domain Materials Settings
- Domain Cache Settings
These settings allow users to fine-tune the visual quality, motion, shading, and performance of the smoke simulation to match the needs of the scene.
Garage
The Garage tab manages the vehicle associated with the Animation System and provides tools for assigning, replacing, and configuring cars used by the system.
If the assigned vehicle comes from the iCars library or from a custom car previously added to the library using the Append Car panel, the setup is already compatible with the Animation System.
In this case, the user only needs to assign the vehicle’s armature to the system’s vehicle socket, and the system will automatically recognize all required components.

If the user wants to use a vehicle that is not part of the iCars library, the Garage provides manual configuration options. This allows external vehicles to be adapted to work with the Animation System.
In this workflow, the user can manually assign the required vehicle components, such as the body, wheels, and other relevant parts, ensuring correct behavior during animation and simulation.
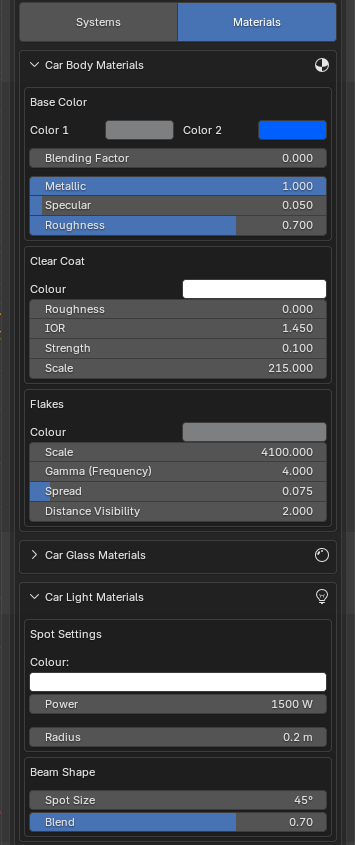
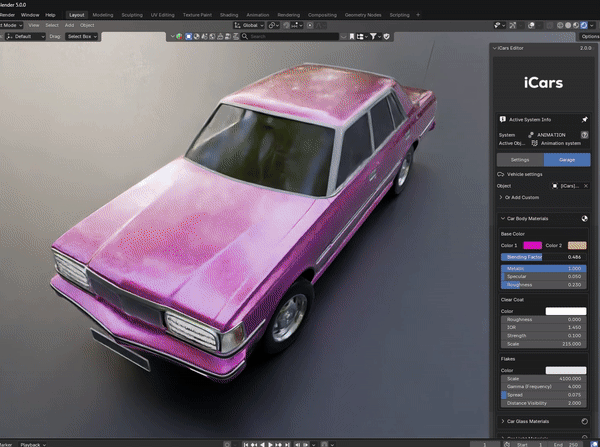
The Garage tab also includes material controls, allowing users to modify the appearance of the assigned vehicle directly from the interface.
Material settings provide quick access to vehicle materials without the need to manually locate and edit them in the Blender material editor.
Rig System
The Rig System is responsible for configuring the physical structure of a vehicle by setting up Rigid Body and Rigid Body Constraints on its components. This process creates a physical car collider that can interact correctly with forces, terrain, and user input during simulation.
The rig feature is available from a dedicated interface in the system’s start panel. It acts as the preparation stage required before starting the Free Drive system.
For vehicles from the iCars library, rigging is handled automatically. When a library vehicle is appended using the system append button and the user presses the Free Drive button, the rig is applied without manual setup.
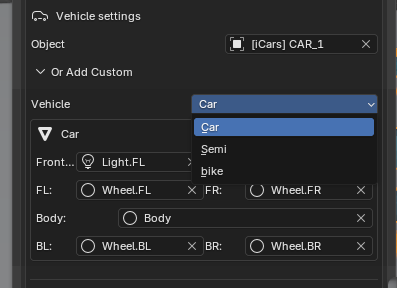
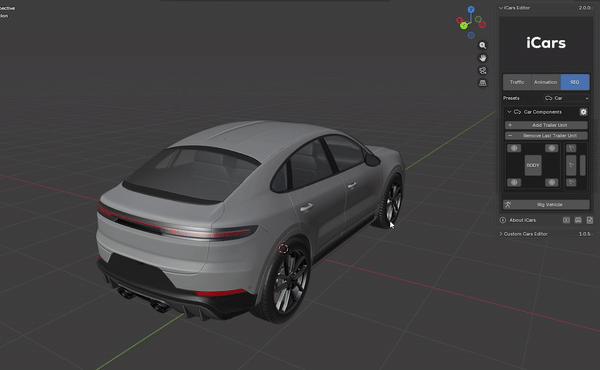
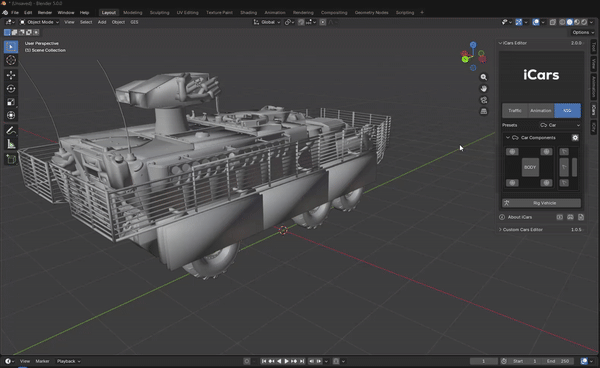
The Rig interface provides a set of predefined vehicle presets that define the general structure of the vehicle. These presets differ in unit count and axle configuration.
- Car
- Truck
- Bike
Each preset generates a structural template that reflects the expected vehicle components, such as body units, axles, and wheels.
Once a preset is selected, the interface displays a structural hierarchy that represents the vehicle components required by the system.
The user must select the corresponding object from their own model and press the matching component button in the interface. This action links the selected object to the rig system.
To the right of the structure, a set of control buttons allows the user to:
- Select individual components
- Modify component-specific settings
- Select entire units, including body and axles, and adjust their properties
Advanced vehicle configuration options are available from the structure controls located at the top-right of the Rig interface.
From this panel, the user can:
- Add or remove axles
- Add or remove trailer units
- Add or remove hinge constraints
- Enable or disable steering on axle wheels
Each axle can be configured to contain one or two wheels and can be set as powered or non-powered. Powered axles include motors that drive wheel rotation, while non-powered axles rotate passively.
This system allows the creation of a wide range of vehicle configurations, including front-wheel drive, rear-wheel drive, four-wheel drive, and more complex multi-unit setups.
Once the user is satisfied with the vehicle structure and component assignments, pressing the Rig button will finalize the setup.
This action generates a new rigged structure containing all required rigid body data, constraints, and physical properties. After rigging is complete, the vehicle is ready to be used with the Free Drive system.
Free Drive System
The Free Drive System allows users to interactively drive a vehicle using real-time physics simulation. It is designed for testing vehicle behavior, recording natural motion, and creating dynamic driving sequences directly inside Blender.
Like the other systems, the Free Drive interface includes an information header displaying the system status and a Pin Interface option. When enabled, the interface remains visible even if the user changes selection.
The Free Drive interface is divided into two main tabs: Settings, which controls driving behavior and simulation environment, and Garage, which manages vehicle materials and physical properties.
Settings
The Settings tab contains all controls related to driving interaction and physical simulation. It is divided into two sub-tabs: Free Drive and Environment.
Free Drive
The Free Drive tab is the main interface used to drive and interact with the vehicle. Pressing the Drive Mode button or using the CTRL + D keybind starts the simulation.
Once active, the user can control the vehicle using predefined keyboard inputs. All keybindings can be customized from the addon preferences.
In addition to keyboard input, sliders are available to manually control driving parameters, allowing precise adjustments without entering Drive Mode.
Available driving controls include:
- Driving speed
- Acceleration and deceleration
- Maximum forward speed
- Reverse speed
- Steering speed
- Maximum steering angle
- Steering return speed
- Nitro multiplier for boost behavior
Environment
The Environment tab controls global simulation and physics settings that affect how the vehicle behaves during Free Drive.
From this tab, users can adjust rigid body world parameters, including:
- Simulation speed
- Simulation start and end frames
- Steps per frame
- Solver iterations
Cache controls allow users to bake the simulation for stable playback and improved performance. The cache can be deleted and rebaked at any time if the result is not working as intended.
The Free Drive System also supports camera and terrain interaction. Users can attach cameras to the vehicle and toggle between them using configurable keybindings.
Terrain colliders can be added to define how the vehicle interacts with the environment. Users can control physical properties such as friction, collider type, and other collision-related parameters.
Garage
In the Free Drive System, the Garage tab exposes the same rig interface used during vehicle rigging, but with a different purpose and behavior.
The vehicle structure hierarchy is displayed for reference only and is disabled for editing. This prevents structural changes while driving, ensuring simulation stability.
Although the structure itself cannot be modified, the selection buttons located to the right of each component remain active. These allow the user to select individual vehicle parts directly from the interface.
Once a component is selected, the user can edit its physical properties and constraints. This includes both Rigid Body and Rigid Body Constraint settings.
From the Garage interface, users can adjust parameters such as:
- Friction and mass (weight)
- Impulse and damping behavior
- Constraint limits and motor settings
- Rotational and positional limits
These controls provide a high level of customization, allowing users to fine-tune vehicle behavior and achieve a wide range of driving characteristics without re-rigging the vehicle.
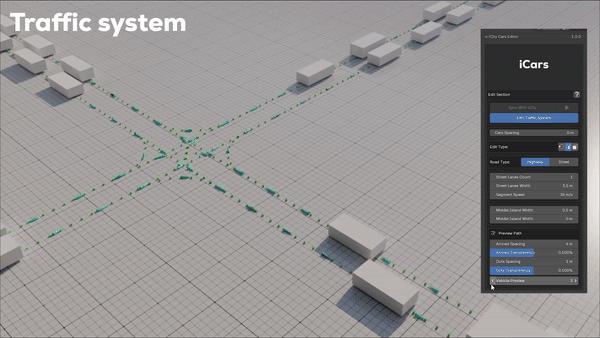
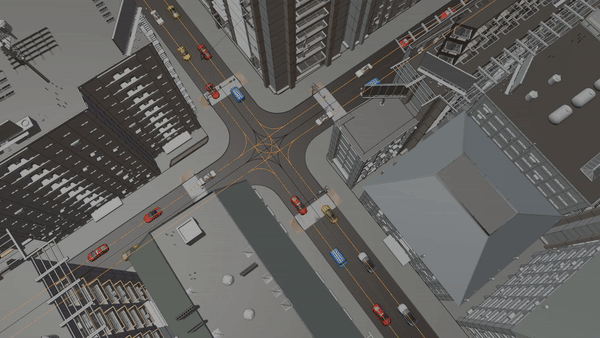
Traffic System
The Traffic System allows users to create large-scale, rule-based vehicle traffic simulations using a procedural Geometry Nodes–driven workflow. It is designed to handle complex road networks, intersections, and vehicle behavior efficiently.
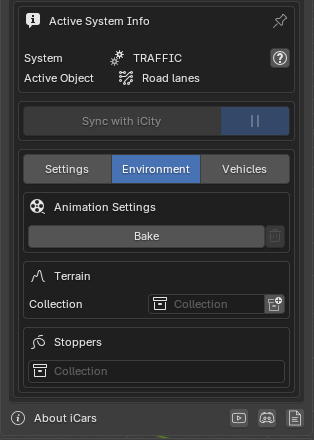
When the Traffic System is started, an information box appears at the top of the interface, displaying system status and providing access to the Pin Interface option.
When Pin Interface is enabled, the Traffic System interface remains visible even if the user changes selection in the scene.
Below the information box, the Sync with iCity button allows the Traffic System to link its driving paths with iCity road lanes, enabling vehicles to drive directly on iCity street networks.
This feature is covered in detail in Chapter 7.
Traffic Settings
The Settings tab contains the main global controls for configuring the traffic simulation. Most Traffic System parameters are stored as mesh attributes and are driven procedurally through Geometry Nodes.
Path Editing
The traffic path is defined by a mesh object that represents the driving network. This mesh controls how vehicles are distributed and how they move through the scene.
By pressing Edit Path, the user enters Edit Mode and can modify the general layout of the traffic network. The path mesh can also be shown or hidden from the interface for better viewport clarity.
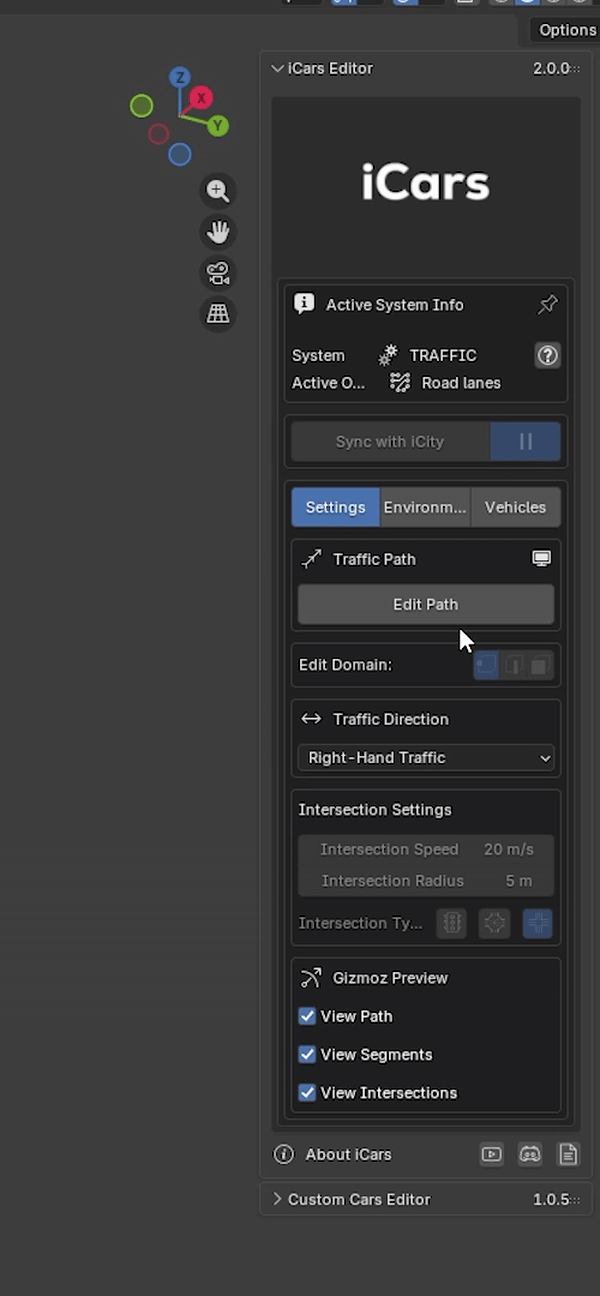
Edit Domains
Traffic behavior is controlled through three mesh domains: Vertex, Edge, and Face. The interface dynamically updates based on the currently active edit mode.
Settings are not stacked together but are replaced contextually to ensure consistent and clear usage.
Vertex Domain — Intersections
The Vertex domain controls intersection behavior. These settings are only available when the user is in Vertex Edit Mode.
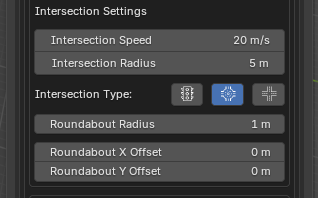
There are three types of intersections:
- Default Intersections
- Traffic Light Intersections — Users can control green and orange light timings.
- Roundabout Intersections — Users can control the radius and offset of the roundabout.
For each intersection, the user can adjust the intersection radius and control the vehicle speed through it. These settings are disabled outside of Vertex Edit Mode.
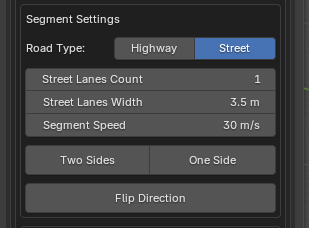
Edge Domain — Road Segments
The Edge domain controls road segments, which represent roads and highways. These settings are only available in Edge Edit Mode.
From this domain, users can:
- Define lane count and lane width
- Set default speed per segment
- Specify one-way or two-way traffic
- Flip the driving direction of the segment
All Edge domain settings are disabled in Object Mode and Vertex Mode.
Face Domain
The Face domain does not currently contain any settings. It is reserved for future features and remains available for selection if needed.
Traffic Direction
At the global level, users can define the traffic direction as either Left-Hand Traffic or Right-Hand Traffic, affecting how vehicles drive on all connected segments.
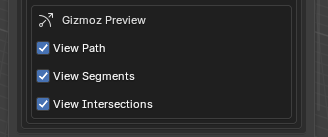
Preview Settings
Preview options allow users to visualize traffic data directly in the viewport. These settings control the visibility of gizmos representing:
- Intersection types and radius
- Segment speed values
- Path and segment directions
Environment
The Environment tab contains settings related to simulation performance, terrain interaction, and obstacle handling.
Users can bake the traffic animation to improve playback smoothness, delete the cache, or rebake the simulation at any time.
Terrain interaction allows traffic lanes to adapt to ground geometry. This system uses the same terrain configuration workflow as the Animation System, without the Snap to Ground boolean.
At the end of the Environment settings, users can define a Stoppers Collection. This collection contains objects that act as obstacles, preventing vehicles from passing through them when placed on the road.
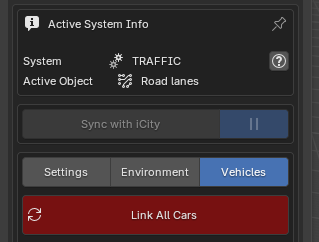
Vehicles
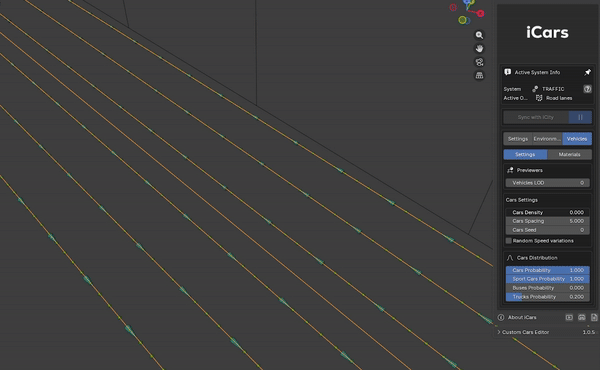
The Vehicles tab defines which cars are used by the Traffic System and how they are distributed throughout the road network.
By default, the Traffic Pack includes two free vehicles that can be used in traffic simulations. When the user purchases the Vehicles Pack or the Full Pack, the entire iCars vehicle library becomes available for use with the Traffic System.
When all vehicles are available, the user can press the Link All Cars button at the top of the Vehicles tab. This action links all available vehicles to the Traffic System automatically.
Vehicle Distribution Settings
Global distribution settings control how vehicles are spawned and distributed across the traffic network.
From this panel, users can adjust:
- Density — Controls the number of vehicles in the system
- Spacing — Defines the distance between vehicles
- Random Seed — Controls randomization for consistent results
- Speed — Sets base traffic speed
- Speed Variation — Adds natural speed differences between vehicles
- Vehicle Type Probability — Defines how frequently each vehicle type appears
Level of Detail
Level of Detail (LOD) settings allow users to optimize performance by controlling which vehicle variants are used at different distances.
These settings help maintain smooth performance in large-scale scenes while preserving visual quality in close-up views.
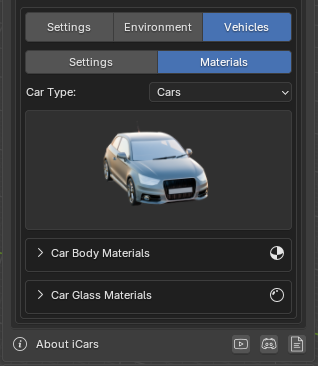
Materials
The Materials tab allows users to customize the appearance of traffic vehicles directly from the Traffic System interface.
A thumbnail-based browser displays all linked vehicles. Users can select a vehicle from the browser and adjust its materials without leaving the Traffic workflow.
Sync with iCity
Syncing with iCity allows the iCars Traffic System to use iCity’s road network as its driving paths. When synced, iCars automatically reads iCity’s Base object and Road object and converts them into traffic paths.
This enables vehicles to recognize streets, intersections, and the overall road layout, allowing traffic simulation to run directly on iCity-generated cities.
To sync, the user only needs to press the Sync with iCity button in the Traffic System interface. No additional setup is required.
Important: This feature requires iCity to be installed and running in the current scene. The iCity system must be started before syncing traffic.
Live Sync
iCars also supports Live Sync between the Traffic System and iCity.
When Live Sync is enabled, any changes made to the iCity road layout are immediately reflected in the traffic paths. This allows users to edit the city structure while observing traffic behavior in real time.
If Live Sync is disabled, editing becomes isolated. The user can freely modify the city layout without affecting traffic paths. Once editing is complete, pressing Live Sync again will update the traffic paths to match the new road configuration.
This workflow provides full flexibility, allowing users to choose between real-time feedback and controlled, staged updates.
